Electric Burner Doesn’t Heat
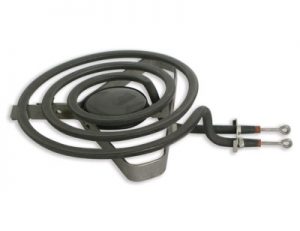 Electric cooking appliances are in general considered safer than their gas counterparts. However, the increased complexity of these appliances means that they have more breaking points, and ultimately that the appliance might be less durable. Now, do not get me wrong, it doesn’t really mean your stove or electric oven have shorter lifetime than gas appliances – while the heating elements can break from time to time, it shouldn’t be too difficult to repair and replace them – and if the problem is simple, or at least easy to diagnose, you may often replace the elements on your own. A stove burner draws much more power than a heating element in the oven, therefore they are connected to a 240-volt circuit to get power.
Follow the following steps in order to diagnose and replace your damaged electric burner:
Inspect the Burner
Keep in mind that you may be a subject of the electric shock if you work with electrical appliances. Therefore, the first step you should do is to unplug your appliance. Slightly lift the damaged burner in order to determine if it is hardwired to your appliance or if it plugs in.
Replace a Plug-In Burner
Cleaning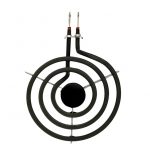
Unplug a burner and clean the prongs that plug into the burner’s receptacle. Rub the prongs to remove dirt, rust, possible soils etc. Reinstall the burner and see if it works.
Try another burner
Of course, it wouldn’t always work. If this doesn’t help – replace the burner with another burner from your appliance. If it works – it means you have to replace the faulty burner. If the prongs are burnt you may have to replace the receptacle as well.
Replace a Hardwired Burner
 Remove the burner
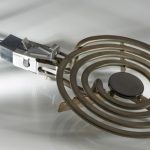
Pull out the burner from the stove until you see a white insulator with clips. Open the insulator and detach the clips. Remove the screws that remove the wire from the insulators.
Try another burner
Replace the burner with another one, turn on the burner to see if it works. In case another burner does work correctly, you will have to replace the faulty burner with a new one.
Replacing the Receptacle
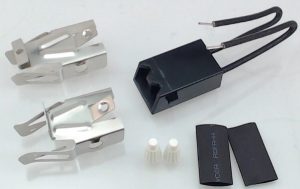 Sometimes the problem can lie not in the burning itself but with the receptacle. One of the most notorious syndromes is the burnt prongs of your burner. The first steps in replacing the receptacle would be to unplug your appliance and remove the burner.
Remove the Receptacle
Rise the lid of your range or countertop. It often rises the same manner as you would rise the car hood. Unscrew the old receptacle. It is also connected to the stove with two wires – cut them with a wire cutter to remove the receptacle completely. However, leave at least several inches of wire hanging out.
Attach New Wires
Strip the wires attached to the stove, make sure there is no insulation left on them. You will need at least ¼ of an inch to be able to reconnect the wires. Attach new receptacle’s wires to the stove wires with the wire nuts (they are normally included in the receptacle kit).
Screw the Receptacle
Once the wires are properly connected – screw the receptacle to the stove or the countertop. You will find the necessary screws in the receptacle installation kit.
Put it back together
After you install the receptacle – close the lid of your appliance and reinstall the burner. Turn on the appliance and check if the element works properly. By the way, feel free to use this repair as an opportunity to clean the burner.
Diagnosing Circuitry
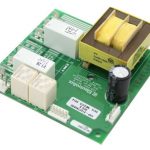 Unfortunately, the problem with your burner can be caused by faulty circuitry. We do not cover this topic in details, and we would recommend you to set up an appointment with a professional technician to diagnose your appliance.
